Hi guys! Have you ever wanted to start wearing or even just try false lashes but always felt intimidated?
Well today I am going to be explaining how to apply false lashes easily while still having them look natural. Lets start!
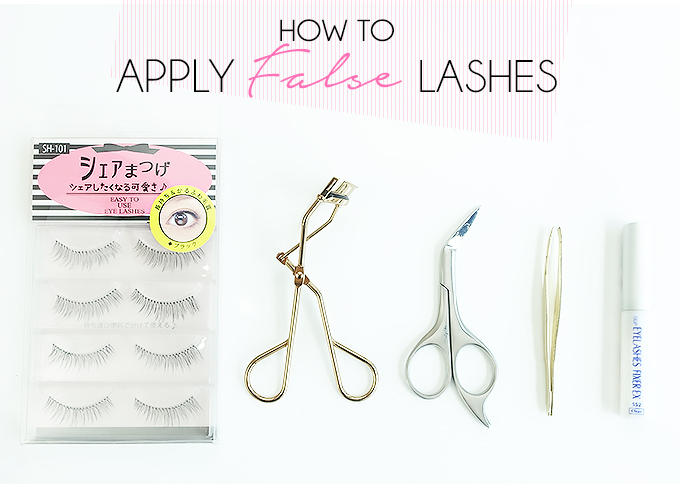
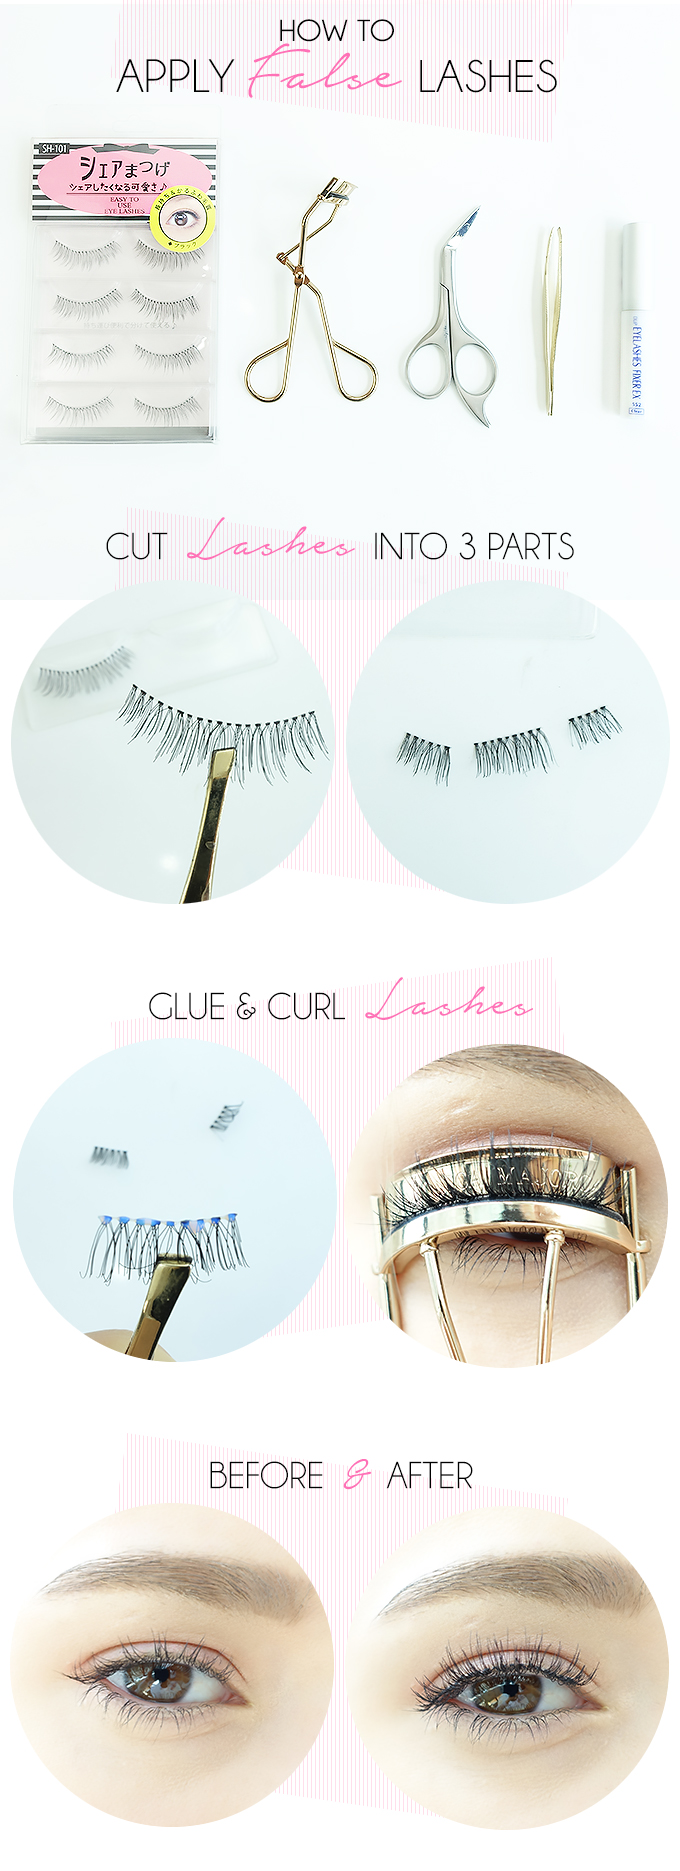
You will need:
- False lashes – I’m using a Japanese brand I got in Japan.
- Cosmetic Scissors – I’m using Sally Hansen
- Tweezers – I’m using tweezers from Daiso Japan
- Eye Lash Glue – I’m using my D.U.P Eyelash Fixer EX in 522 Clear
- Eye Lash Curler – I’m using my limited edition Majolica Majorca Eye Lash Curler by Shiseido
Step 1
It’s important to buy the right lashes, If you want lashes to blend naturally into your own lashes, then it is best to buy false lashes that have a clear band. The band is the part that the hairs are attached to. Many cheaper false lashes have thick black bands. These lashes can be very noticeable and can actually look very cheap and overall bad. When I am purchasing lashes, I always look carefully at the band to make sure it is clear and thin.
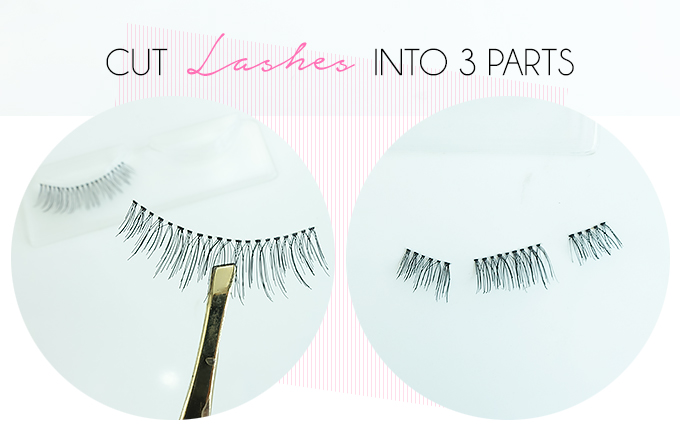
Once you have your lashes, remove them from the packaging and with small cosmetic scissors, cut them into 3 sections. You can apply lashes as they originally are, but it is easier and looks more natural when you cut them into 3. I do this because it makes it easier to apply the lashes as close to your natural lashes. I also have that common problem where false lashes lift from my lash line over time. This is because the band of the false lashes does not match my natural eye shape. So cutting the band into 3 allows the false lashes to better match the shape of your eyes. Thus making everything look more natural and last longer.
Step 3
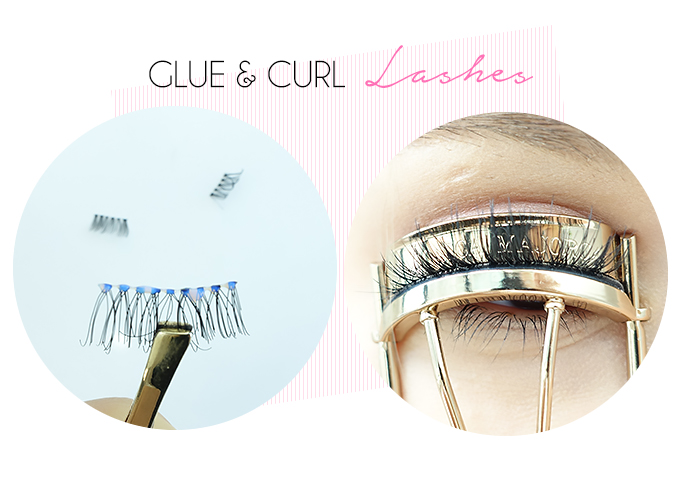
It’s time to blue the lashes on! Don’t worry, it isn’t that hard if you have the right tools. I like to always first have mascara on prior to applying my lashes, but you can choose to do this after. Then with cosmetic tweezers, pick up the middle piece of your false lashes we cut earlier. With a good quality glue, apply a adequate amount onto the band. Be careful not to get any glue on the hairs! Now, wait a few sections for the glue to slightly set, then gently apply the lashes to the middle of your lash line, placing the center part of the band as close to your natural lashes as possible. Then with the tweezers, place the end corners of the band down onto the lash line as close as physically possible. Adjust the position as needed, then repeat these steps with the additional 2 pieces of false lashes.
Once all the pieces are applied, with your finger, press the band down, then pinch the lashes together with your natural lashes. This will help them bend better.
Step 4
Now taking a good eye lash curler, curl your false lashes together with your natural lashes. Doing this will make your false lashes and natural lashes have the same curve and shape. Thus making your false lashes look even more natural. You can choose to apply mascara here if you haven’t done so already. However I like to apply my mascara before false lashes so that my false lashes don’t get ruined, making them more reusable.
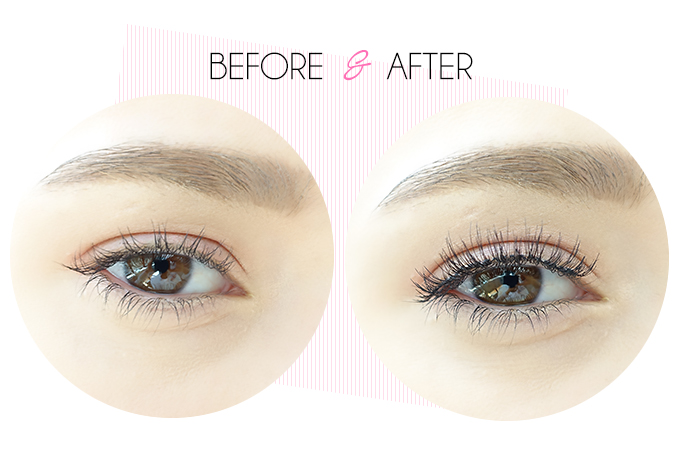
And that is it! You now have natural looking false lashes on! It might take you a few times of practice before you can get it right, but it is really easy once you get the hang of it. I recommend practicing with no makeup on before you go out with false lashes on. Just to make sure you fully know how to do it before you run the chance of ruining any hard work your put into your makeup for a night out.
I hope this tutorial was helpful!






No Comments